
Jahoda
Windthreading Shadow
- Anemo
- Bow
- 4★
- Nod-Krai
- Ascension stat: Healing Bonus
The Curatorium of Secrets' extremely reliable, do-it-all super employee (or so she claims).
What it costs to finish this character
Ascension alone: 760 resin (boss drops only) · all three talents alone: 1,950 resin.
Talent domain: Vagrancy books, open Wednesday, Saturday, Sunday.
A Crown of Insight is needed for the tenth level of each talent, and crowns are not farmable at any resin price — they come from events.
Materials and mora above are exact, straight from the game’s own tables. The resin figure and the day count divide by an average drop per run, which the game does not publish — they are a community-measured mean, not a promise.
Materials
| Material | Total |
|---|---|
 Vayuda Turquoise Gemstone Vayuda Turquoise Gemstone | 6 |
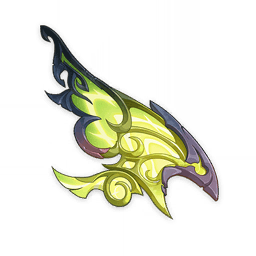 Lightbearing Scale-Feather Lightbearing Scale-Feather | 46 |
 Vayuda Turquoise Chunk Vayuda Turquoise Chunk | 9 |
 Precision Drive Shaft Precision Drive Shaft | 36 |
 Vayuda Turquoise Fragment Vayuda Turquoise Fragment | 9 |
 Reinforced Drive Shaft Reinforced Drive Shaft | 30 |
 Vayuda Turquoise Sliver Vayuda Turquoise Sliver | 1 |
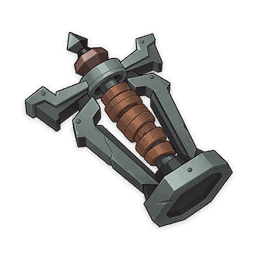 Portable Bearing Portable Bearing | 168 |
 Broken Drive Shaft Broken Drive Shaft | 18 |
| Mora | 420,000 |
| Material | Total |
|---|---|
 Ascended Sample: Knight Ascended Sample: Knight | 6 |
 Crown of Insight Crown of Insight | 1 |
 Philosophies of Vagrancy Philosophies of Vagrancy | 38 |
| Precision Drive Shaft | 31 |
 Guide to Vagrancy Guide to Vagrancy | 21 |
| Reinforced Drive Shaft | 22 |
 Teachings of Vagrancy Teachings of Vagrancy | 3 |
| Broken Drive Shaft | 6 |
| Mora | 1,652,500 |
The talent table is for one ability. Levelling all three costs three times as much.
Talents
Strike While the Arrow's Hot
Normal Attack
Performs up to 3 consecutive shots with a bow.
Charged Attack
Performs a more precise Aimed Shot with increased DMG.
While aiming, mighty winds will accumulate on the arrowhead. A fully charged wind arrow will deal Anemo DMG.
Plunging Attack
Fires off a shower of arrows in mid-air before falling and striking the ground, hitting opponents along the path and dealing AoE DMG upon impact.
| Level | 1 | 2 | 3 | 4 | 5 | 6 | 7 | 8 | 9 | 10 |
|---|---|---|---|---|---|---|---|---|---|---|
| 1-Hit DMG | 41.7% | 45.1% | 48.5% | 53.3% | 56.7% | 60.6% | 65.9% | 71.2% | 76.6% | 82.4% |
| 2-Hit DMG | 19.2%×2 | 20.8%×2 | 22.4%×2 | 24.6%×2 | 26.2%×2 | 28.0%×2 | 30.4%×2 | 32.9%×2 | 35.3%×2 | 38.0%×2 |
| 3-Hit DMG | 51.2% | 55.4% | 59.5% | 65.5% | 69.7% | 74.4% | 81.0% | 87.5% | 94.1% | 101.2% |
| Aimed Shot | 43.9% | 47.4% | 51.0% | 56.1% | 59.7% | 63.7% | 69.4% | 75.0% | 80.6% | 86.7% |
| Fully-Charged Aimed Shot | 124.00% | 133.30% | 142.60% | 155.00% | 164.30% | 173.60% | 186.00% | 198.40% | 210.80% | 223.20% |
| Plunge DMG | 56.8% | 61.5% | 66.1% | 72.7% | 77.3% | 82.6% | 89.9% | 97.1% | 104.4% | 112.3% |
| Low/High Plunge DMG | 113.63%/141.93% | 122.88%/153.49% | 132.13%/165.04% | 145.35%/181.54% | 154.59%/193.10% | 165.17%/206.30% | 179.70%/224.45% | 194.23%/242.61% | 208.77%/260.76% | 224.62%/280.57% |
Savvy Strategy: Splitting the Spoils
Jahoda dashes toward her opponent, entering the Shadow Pursuit state upon contact. While in this state, Jahoda moves continuously and swiftly: If nearby opponents are affected by Pyro, Hydro, Electro, or Cryo, she will quietly convert her Purr-loined Treasure Flask to that element, gradually filling it. When the duration ends or the skill is used again, Jahoda drains the Purr-loined Treasure Flask and deals a single instance of Anemo DMG to nearby opponents. When the Purr-loined Treasure Flask is full, Jahoda immediately drains it, exiting the Shadow Pursuit state and dealing a more powerful instance of Anemo DMG.
If her dash fails to make contact with an opponent, Jahoda instead drops a Smoke Bomb at her location, dealing a single instance of Anemo DMG to nearby opponents.
Moonsign: Ascendant Gleam: When the Purr-loined Treasure Flask becomes full, Jahoda will not immediately discharge it. Instead, for a short duration, she steadily consumes the stored element inside and periodically fires Fluffy Meowballs at nearby opponents, dealing DMG of the corresponding element stored in the Purr-loined Treasure Flask. When a Fluffy Meowball hits an opponent, Jahoda regenerates 2 Elemental Energy. This effect can be triggered once every 3.5s.
There are many ways to divide wealth in this world — but for Nod-Krai's treasure hunters — and hoarders — only one has ever proven sufficiently effective.
| Level | 1 | 2 | 3 | 4 | 5 | 6 | 7 | 8 | 9 | 10 |
|---|---|---|---|---|---|---|---|---|---|---|
| Smoke Bomb DMG | 159.0% | 170.9% | 182.8% | 198.8% | 210.7% | 222.6% | 238.5% | 254.4% | 270.3% | 286.2% |
| Unfilled Treasure Flask DMG | 190.8% | 205.1% | 219.4% | 238.5% | 252.8% | 267.1% | 286.2% | 305.3% | 324.4% | 343.4% |
| Filled Treasure Flask DMG | 212.0% | 227.9% | 243.8% | 265.0% | 280.9% | 296.8% | 318.0% | 339.2% | 360.4% | 381.6% |
| Treasure Flask Duration | 20.0s | 20.0s | 20.0s | 20.0s | 20.0s | 20.0s | 20.0s | 20.0s | 20.0s | 20.0s |
| Meowball DMG | 128.0% | 137.6% | 147.2% | 160.0% | 169.6% | 179.2% | 192.0% | 204.8% | 217.6% | 230.4% |
| CD | 15.0s | 15.0s | 15.0s | 15.0s | 15.0s | 15.0s | 15.0s | 15.0s | 15.0s | 15.0s |
Hidden Aces: Seven Tools of the Hunter
Time to reveal those pocket aces! Jahoda retrieves 2 Purrsonal Coordinated Assistance Robots and deals a single instance of Anemo DMG to nearby opponents.
"Coordinated assistance? It means you 'assist' some Mora our way, and we handle the 'coordination.' Makes purrfect sense, don't you agree?"
| Level | 1 | 2 | 3 | 4 | 5 | 6 | 7 | 8 | 9 | 10 |
|---|---|---|---|---|---|---|---|---|---|---|
| Skill DMG | 207.2% | 222.7% | 238.3% | 259.0% | 274.5% | 290.1% | 310.8% | 331.5% | 352.2% | 373.0% |
| Purrsonal Coordinated Assistance Robot DMG | 17.3% | 18.6% | 19.9% | 21.6% | 22.9% | 24.2% | 25.9% | 27.6% | 29.4% | 31.1% |
| Purrsonal Coordinated Assistance Robot Duration | 12.0s | 12.0s | 12.0s | 12.0s | 12.0s | 12.0s | 12.0s | 12.0s | 12.0s | 12.0s |
| Purrsonal Coordinated Assistance Robot Healing | 79.9% ATK+501 | 85.9% ATK+551 | 91.9% ATK+605 | 99.8% ATK+664 | 105.8% ATK+726 | 111.8% ATK+793 | 119.8% ATK+864 | 127.8% ATK+939 | 135.8% ATK+1018 | 143.8% ATK+1102 |
| Lowest HP Character Additional Healing | 30.7% ATK+193 | 33.0% ATK+212 | 35.3% ATK+233 | 38.4% ATK+255 | 40.7% ATK+279 | 43.0% ATK+305 | 46.1% ATK+332 | 49.2% ATK+361 | 52.2% ATK+392 | 55.3% ATK+424 |
| CD | 18.0s | 18.0s | 18.0s | 18.0s | 18.0s | 18.0s | 18.0s | 18.0s | 18.0s | 18.0s |
| Energy Cost | 70 | 70 | 70 | 70 | 70 | 70 | 70 | 70 | 70 | 70 |
Constellations
- C1 · One More Flask!
When a Fluffy Meowball fired by the Purr-loined Treasure Flask from the Elemental Skill Savvy Strategy: Splitting the Spoils hits an enemy, there is a 50% chance for it to bounce, dealing the corresponding Elemental DMG to nearby opponents.
- C2 · Rogue's Quick Thinking
Moonsign: Ascendant Gleam: In the Ascension Talent "Plan to Get Paid," Jahoda can secretly track, in addition to the element with the highest number of characters, the element with the next highest number of characters among the remaining types. This allows up to two elemental effects to be active at once. You must first unlock the Ascension Talent "Plan to Get Paid."
- C3 · Desperate Gamble
Increases the Level of Hidden Aces: Seven Tools of the Hunter by 3.
Maximum upgrade level is 15.
- C4 · Wild Berry Amid the Dust
When a Purrsonal Coordinated Assistance Robot from the Elemental Burst Hidden Aces: Seven Tools of the Hunter undergoes an Elemental Conversion, Jahoda will recover 4 Elemental Energy.
- C5 · The Greatest Treasure
Increases the Level of Savvy Strategy: Splitting the Spoils by 3.
Maximum upgrade level is 15.
- C6 · The Littlest Luck
Moonsign: Ascendant Gleam: After the Purr-loined Treasure Flask from the Elemental Skill Savvy Strategy: Splitting the Spoils is full, nearby Moonsign characters in your party have their CRIT Rate increased by 5% and CRIT DMG increased by 40% for 20s.
Weapons and artifacts
UNSURE This is not a tier list and not community guidance — this product has neither. It is a mechanical shortlist, and the rule is printed so you can check it: Bows of 4★ and above whose secondary stat is one this character’s ascension stat scales with, ordered by base attack at level 90. Weapon passives are not weighed, because a passive is an effect and not a number.
| Weapon | Rarity | Base ATK at 90 | Secondary stat |
|---|---|---|---|
 Elegy for the End Elegy for the End | 5★ | 608 | Energy Recharge |
 Silvershower Heartstrings Silvershower Heartstrings | 5★ | 542 | HP% |
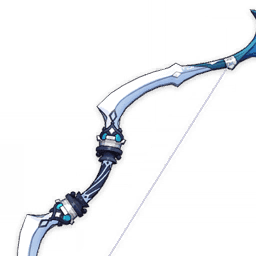 Sacrificial Bow Sacrificial Bow | 4★ | 565 | Energy Recharge |
 Fading Twilight Fading Twilight | 4★ | 565 | Energy Recharge |
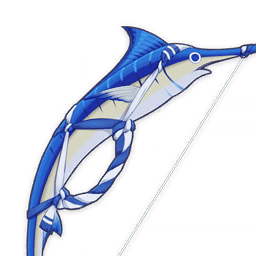 End of the Line End of the Line | 4★ | 510 | Energy Recharge |
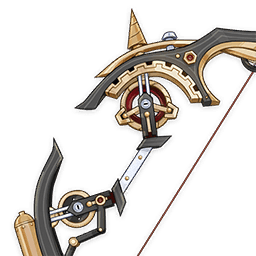 Sequence of Solitude Sequence of Solitude | 4★ | 510 | HP% |
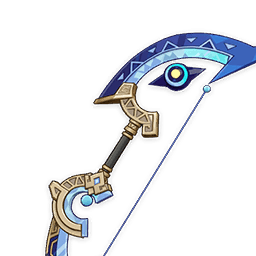 Rainbow Serpent's Rain Bow Rainbow Serpent's Rain Bow | 4★ | 510 | Energy Recharge |
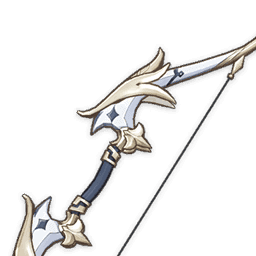 Favonius Warbow Favonius Warbow | 4★ | 454 | Energy Recharge |
| Set | Two-piece | Four-piece |
|---|---|---|
| Viridescent Venerer | Anemo DMG Bonus +15% | Increases Swirl reaction DMG dealt by 60%, and Stellar Swirl reaction DMG dealt by 20%. Decreases opponent's Elemental RES to the element infused in the Swirl by 40% for 10s. Upon triggering a Stellar Swirl in the opponent, will also decrease their Cryo RES by 40%. RES debuffs of the same elemental type do not stack. |
| Desert Pavilion Chronicle | Anemo DMG Bonus +15% | When Charged Attacks hit opponents, the equipping character's Normal Attack SPD will increase by 10% while Normal, Charged, and Plunging Attack DMG will increase by 40% for 15s. |
To turn this into a real recommendation section, add a build dataset — per character, the weapons and sets a community source actually recommends, with the rotation and the reasoning. Nothing in the game’s published data contains that judgement, and a ranking invented here would be indistinguishable from a researched one, which is why there is not one.
Teams
To build a team section, add team data. Which characters go together is judgement about rotations, energy and shielding that this product does not receive and will not guess at.
What is published is the reaction chart. Anemo takes part in:
- Swirl with Pyro
- Swirl with Hydro
- Swirl with Electro
- Swirl with Cryo