
Sayu
Mujina Ninja
- Anemo
- Claymore
- 4★
- Inazuma
- Ascension stat: Elemental Mastery
A pint-sized ninja attached to the Shuumatsuban, who always seems to be lacking sleep.
What it costs to finish this character
Ascension alone: 760 resin (boss drops only) · all three talents alone: 1,950 resin.
Talent domain: Light books, open Wednesday, Saturday, Sunday.
A Crown of Insight is needed for the tenth level of each talent, and crowns are not farmable at any resin price — they come from events.
Materials and mora above are exact, straight from the game’s own tables. The resin figure and the day count divide by an average drop per run, which the game does not publish — they are a community-measured mean, not a promise.
Materials
| Material | Total |
|---|---|
 Vayuda Turquoise Gemstone Vayuda Turquoise Gemstone | 6 |
 Marionette Core Marionette Core | 46 |
 Vayuda Turquoise Chunk Vayuda Turquoise Chunk | 9 |
 Energy Nectar Energy Nectar | 36 |
 Vayuda Turquoise Fragment Vayuda Turquoise Fragment | 9 |
 Shimmering Nectar Shimmering Nectar | 30 |
 Vayuda Turquoise Sliver Vayuda Turquoise Sliver | 1 |
 Crystal Marrow Crystal Marrow | 168 |
 Whopperflower Nectar Whopperflower Nectar | 18 |
| Mora | 420,000 |
| Material | Total |
|---|---|
 Gilded Scale Gilded Scale | 6 |
 Crown of Insight Crown of Insight | 1 |
 Philosophies of Light Philosophies of Light | 38 |
| Energy Nectar | 31 |
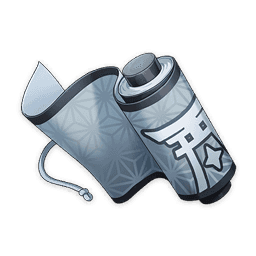 Guide to Light Guide to Light | 21 |
| Shimmering Nectar | 22 |
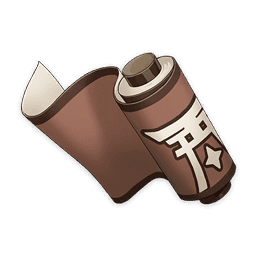 Teachings of Light Teachings of Light | 3 |
| Whopperflower Nectar | 6 |
| Mora | 1,652,500 |
The talent table is for one ability. Levelling all three costs three times as much.
Talents
Shuumatsuban Ninja Blade
Normal Attack
Performs up to 4 consecutive strikes.
Charged Attack
Drains Stamina over time to perform continuous spinning attacks against all nearby opponents.
At the end of the sequence, performs a more powerful slash.
Plunging Attack
Plunges from mid-air to strike the ground below, damaging opponents along the path and dealing AoE DMG upon impact.
| Level | 1 | 2 | 3 | 4 | 5 | 6 | 7 | 8 | 9 | 10 |
|---|---|---|---|---|---|---|---|---|---|---|
| 1-Hit DMG | 72.2% | 78.1% | 84.0% | 92.4% | 98.3% | 105.0% | 114.2% | 123.5% | 132.7% | 142.8% |
| 2-Hit DMG | 71.4% | 77.2% | 83.0% | 91.3% | 97.1% | 103.8% | 112.9% | 122.0% | 131.1% | 141.1% |
| 3-Hit DMG | 43.4%+43.4% | 47.0%+47.0% | 50.5%+50.5% | 55.5%+55.5% | 59.1%+59.1% | 63.1%+63.1% | 68.7%+68.7% | 74.2%+74.2% | 79.8%+79.8% | 85.9%+85.9% |
| 4-Hit DMG | 98.1% | 106.1% | 114.1% | 125.5% | 133.5% | 142.6% | 155.2% | 167.7% | 180.3% | 194.0% |
| Charged Attack Spinning DMG | 62.5% | 67.6% | 72.7% | 80.0% | 85.1% | 90.9% | 98.9% | 106.9% | 114.9% | 123.6% |
| Charged Attack Final DMG | 113.09% | 122.30% | 131.50% | 144.65% | 153.86% | 164.38% | 178.84% | 193.31% | 207.77% | 223.55% |
| Charged Attack Stamina Cost | 40.0/s | 40.0/s | 40.0/s | 40.0/s | 40.0/s | 40.0/s | 40.0/s | 40.0/s | 40.0/s | 40.0/s |
| Max Duration | 5.0s | 5.0s | 5.0s | 5.0s | 5.0s | 5.0s | 5.0s | 5.0s | 5.0s | 5.0s |
| Plunge DMG | 74.6% | 80.7% | 86.7% | 95.4% | 101.5% | 108.4% | 118.0% | 127.5% | 137.0% | 147.4% |
| Low/High Plunge DMG | 149.14%/186.29% | 161.28%/201.45% | 173.42%/216.62% | 190.77%/238.28% | 202.91%/253.44% | 216.78%/270.77% | 235.86%/294.60% | 254.93%/318.42% | 274.01%/342.25% | 294.82%/368.25% |
Yoohoo Art: Fuuin Dash
The special technique of the Yoohoo Ninja Arts!
Sayu curls up into a rolling Fuufuu Windwheel and smashes into opponents at high speed, dealing Anemo DMG. When the duration ends, she unleashes a Fuufuu Whirlwind Kick, dealing AoE Anemo DMG.
Press
Enters the Fuufuu Windwheel state, rolling forward a short distance before using the Fuufuu Whirlwind Kick.
Hold
Rolls about continuously in the Fuufuu Windwheel state, increasing Sayu's resistance to interruption while within that state.
During this time, Sayu can control the direction of her roll, and can use the skill again to end her Windwheel state early and unleash a stronger version of the Fuufuu Whirlwind Kick.
The Hold version of this skill can trigger Elemental Absorption.
This skill has a maximum duration of 10s and enters CD once its effects end. The longer Sayu remains in her Windwheel state, the longer the CD.
Elemental Absorption
If Sayu comes into contact with Hydro/Pyro/Cryo/Electro while in her Windwheel state, she will deal additional elemental DMG of that type.
Elemental Absorption may only occur once per use of this skill.
Sayu can pull this skill off with her eyes closed. This technique was originally created for escaping, but now that she's got a Vision, might as well make her foes eat dirt while she's at it.
| Level | 1 | 2 | 3 | 4 | 5 | 6 | 7 | 8 | 9 | 10 |
|---|---|---|---|---|---|---|---|---|---|---|
| Fuufuu Windwheel DMG | 36.0% | 38.7% | 41.4% | 45.0% | 47.7% | 50.4% | 54.0% | 57.6% | 61.2% | 64.8% |
| Fuufuu Whirlwind Kick Press DMG | 158.4% | 170.3% | 182.2% | 198.0% | 209.9% | 221.8% | 237.6% | 253.4% | 269.3% | 285.1% |
| Fuufuu Whirlwind Kick Hold DMG | 217.6% | 233.9% | 250.2% | 272.0% | 288.3% | 304.6% | 326.4% | 348.2% | 369.9% | 391.7% |
| Fuufuu Windwheel Elemental DMG | 16.8% | 18.1% | 19.3% | 21.0% | 22.3% | 23.5% | 25.2% | 26.9% | 28.6% | 30.2% |
| Fuufuu Whirlwind Kick Elemental DMG | 76.2% | 81.9% | 87.6% | 95.2% | 100.9% | 106.6% | 114.2% | 121.9% | 129.5% | 137.1% |
| Max Duration (Hold) | 10.0s | 10.0s | 10.0s | 10.0s | 10.0s | 10.0s | 10.0s | 10.0s | 10.0s | 10.0s |
| CD | 6.0 to 11.0s | 6.0 to 11.0s | 6.0 to 11.0s | 6.0 to 11.0s | 6.0 to 11.0s | 6.0 to 11.0s | 6.0 to 11.0s | 6.0 to 11.0s | 6.0 to 11.0s | 6.0 to 11.0s |
Yoohoo Art: Mujina Flurry
The other super special technique of the Yoohoo Ninja Arts! It summons a pair of helping hands for Sayu.
Deals Anemo DMG to nearby opponents and heals all nearby party members. The amount of HP restored is based on Sayu's ATK. This skill then summons a Muji-Muji Daruma.
Muji-Muji Daruma
At specific intervals, the Daruma will take one of several actions based on the situation around it:
·If the HP of nearby characters is above 70%, it will attack a nearby opponent, dealing Anemo DMG.
·If there are active characters with 70% or less HP nearby, it will heal the active character with the lowest percentage HP left. If there are no opponents nearby, it will heal active characters nearby even if they have 70% HP or more.
People who don't know the first thing about ninjutsu love to watch Sayu show off this skill, and some have tried to learn it from her. But Sayu just wants to sleep and not be disturbed.
| Level | 1 | 2 | 3 | 4 | 5 | 6 | 7 | 8 | 9 | 10 |
|---|---|---|---|---|---|---|---|---|---|---|
| Skill Activation DMG | 116.80% | 125.56% | 134.32% | 146.00% | 154.76% | 163.52% | 175.20% | 186.88% | 198.56% | 210.24% |
| Skill Activation Healing | 92.2% ATK+577 | 99.1% ATK+635 | 106.0% ATK+698 | 115.2% ATK+765 | 122.1% ATK+837 | 129.0% ATK+914 | 138.2% ATK+996 | 147.5% ATK+1083 | 156.7% ATK+1174 | 165.9% ATK+1270 |
| Muji-Muji Daruma DMG | 52.00% | 55.90% | 59.80% | 65.00% | 68.90% | 72.80% | 78.00% | 83.20% | 88.40% | 93.60% |
| Muji-Muji Daruma Healing | 79.9% ATK+500 | 85.9% ATK+550 | 91.9% ATK+605 | 99.8% ATK+663 | 105.8% ATK+726 | 111.8% ATK+792 | 119.8% ATK+863 | 127.8% ATK+938 | 135.8% ATK+1017 | 143.8% ATK+1101 |
| Duration | 12.0s | 12.0s | 12.0s | 12.0s | 12.0s | 12.0s | 12.0s | 12.0s | 12.0s | 12.0s |
| CD | 20.0s | 20.0s | 20.0s | 20.0s | 20.0s | 20.0s | 20.0s | 20.0s | 20.0s | 20.0s |
| Energy Cost | 80 | 80 | 80 | 80 | 80 | 80 | 80 | 80 | 80 | 80 |
Constellations
- C1 · Multi-Task no Jutsu
The Muji-Muji Daruma created by Yoohoo Art: Mujina Flurry will ignore HP limits and can simultaneously attack nearby opponents and heal characters.
- C2 · Egress Prep
Yoohoo Art: Fuuin Dash gains the following effects:
·DMG of Fuufuu Whirlwind Kick in Press Mode increased by 3.3%.
·Every 0.5s in the Fuufuu Windwheel state will increase the DMG of this Fuufuu Whirlwind Kick by 3.3%. The maximum DMG increase possible through this method is 66%.
- C3 · Eh, the Bunshin Can Handle It
Increases the Level of Yoohoo Art: Mujina Flurry by 3.
Maximum upgrade level is 15.
- C4 · Skiving: New and Improved
Sayu recovers 1.2 Energy when she triggers a Swirl or Stellar Swirl reaction while on-field.
This effect occurs once every 2s.
- C5 · Speed Comes First
Increases the Level of Yoohoo Art: Fuuin Dash by 3.
Maximum upgrade level is 15.
- C6 · Sleep O'Clock
The Muji-Muji Daruma created by Sayu's Yoohoo Art: Mujina Flurry will now also benefit from her Elemental Mastery. Each point of Sayu's Elemental Mastery will produce the following effects:
·Increases the damage dealt by the Muji-Muji Daruma's attacks by 0.2% ATK. A maximum DMG increase of 400% ATK can be gained via this method.
·Increases the HP restored by the Muji-Muji Daruma by 3. A maximum of 6,000 additional HP can be restored in this manner.
Weapons and artifacts
UNSURE This is not a tier list and not community guidance — this product has neither. It is a mechanical shortlist, and the rule is printed so you can check it: Claymores of 4★ and above whose secondary stat is one this character’s ascension stat scales with, ordered by base attack at level 90. Weapon passives are not weighed, because a passive is an effect and not a number.
| Weapon | Rarity | Base ATK at 90 | Secondary stat |
|---|---|---|---|
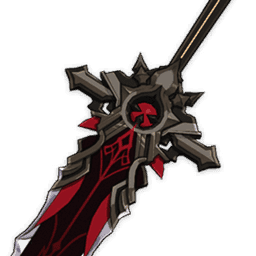 Wolf's Gravestone Wolf's Gravestone | 5★ | 608 | ATK% |
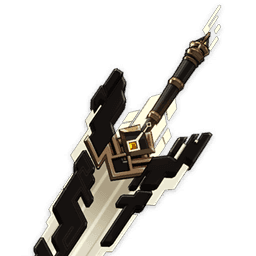 The Unforged The Unforged | 5★ | 608 | ATK% |
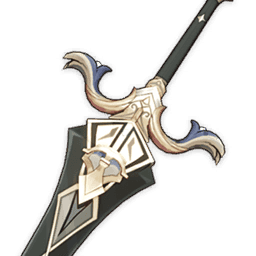 Royal Greatsword Royal Greatsword | 4★ | 565 | ATK% |
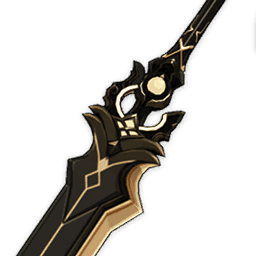 Prototype Archaic Prototype Archaic | 4★ | 565 | ATK% |
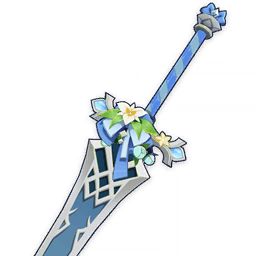 Mailed Flower Mailed Flower | 4★ | 565 | Elemental Mastery |
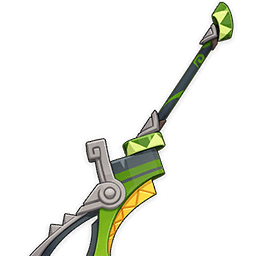 Fruitful Hook Fruitful Hook | 4★ | 565 | ATK% |
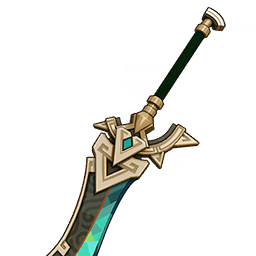 Earth Shaker Earth Shaker | 4★ | 565 | ATK% |
 Blade of Atonement Blade of Atonement | 4★ | 565 | ATK% |
| Set | Two-piece | Four-piece |
|---|---|---|
| Viridescent Venerer | Anemo DMG Bonus +15% | Increases Swirl reaction DMG dealt by 60%, and Stellar Swirl reaction DMG dealt by 20%. Decreases opponent's Elemental RES to the element infused in the Swirl by 40% for 10s. Upon triggering a Stellar Swirl in the opponent, will also decrease their Cryo RES by 40%. RES debuffs of the same elemental type do not stack. |
| Desert Pavilion Chronicle | Anemo DMG Bonus +15% | When Charged Attacks hit opponents, the equipping character's Normal Attack SPD will increase by 10% while Normal, Charged, and Plunging Attack DMG will increase by 40% for 15s. |
To turn this into a real recommendation section, add a build dataset — per character, the weapons and sets a community source actually recommends, with the rotation and the reasoning. Nothing in the game’s published data contains that judgement, and a ranking invented here would be indistinguishable from a researched one, which is why there is not one.
Teams
To build a team section, add team data. Which characters go together is judgement about rotations, energy and shielding that this product does not receive and will not guess at.
What is published is the reaction chart. Anemo takes part in:
- Swirl with Pyro
- Swirl with Hydro
- Swirl with Electro
- Swirl with Cryo